In this article, you’ll learn with a few simple steps how to start a travel blog and monetize it.
“So, you travel and blog about it, right?” or “Awesome! You write a travel blog and make money off it!”
These are the most frequent questions and remarks we hear from random people and travelers we meet on the road. Recently we’ve also started to give online consultations on how to start a travel blog via Skype.
We won’t lie. To run a travel blog is a wonderful experience. Especially if writing and photography are your passions, like in our case. The other side of the coin is that creating an engaging and financially sustainable travel blog is like starting any other business, which means you need:
• To treat it as a business from day one
• To invest some money
• To learn new things constantly and never use the old excuse “I’m not good at technology.”
• A lot of social and business networking
• AND be confident, you CAN do it
How to start a travel blog
In this guide I’ll show you how to start a travel blog in 7 easy steps. The process is quite easy and you don’t need to be a techie to set everything up.
Choose a name

Choosing a name when starting a travel blog is probably the most important step before anything else. Remember, your name will be your brand. Once chosen, it’ll be really hard to change it. Re-branding is expensive and time-consuming, and you will waste all the SEO efforts you exerted through the years.
Do some brainstorming; think about all words related to travel, your personality traits, and the things you like to do while exploring the world.
Write them down.
Think long-term so you avoid choosing a name that will not match with your future lifestyle or destinations you want to travel to.
For example, you might feel tempted to include a specific country in the name of the blog, and while you could do an amazing job covering that particular destination, do you really want to visit only one land while roaming around the world?
Make it short, catchy, easy to spell and read. Don’t use hyphens and numbers. And above all, be unique and different from your competitors.
Define your niche

When you start a travel blog, it can be difficult deciding on your niche. Maybe you like things that are extremely different from each other (e.g. diving and fashion). Or maybe you have only little experience with something (hitch-hiking around the world). Or maybe you just don’t want to focus only on one topic.
In any case, give yourself a minute and think about the topics you want to write about on your travel blog. Do you prefer to tell more personal stories that will engage your audience, or do you want to build more of an informative platform where other travelers can find some useful tips?
Or maybe you would like to do both? It’s up to you, and you’ll need some time to see what works the best for you, and what resonates the most with your audience. When in doubt, ask your best friends or avid travelers you know what would they love to read on your blog?
Try to find your own voice, your personal approach in describing what you experience on the road. Nobody wants to read boring diaries with no story line or plain lists of things missing a personal touch.
Get inspired by more digital nomad articles:
- Travel Medical Insurance for Digital Nomads: Why You REALLY Need It
- How to Become a Digital Nomad: Jump Into the Digital Nomad Lifestyle, Step by Step
- Digital Nomad Guide to Thailand: Taking Your First Steps
- Tep Wireless Review: a Portable WiFi Hotspot For Travelers
Buy your domain and host
Once you have decided on your blog name and the topics you want to blog about, you need to buy a domain (the URL, the ‘address’ of your website) and pay a web hosting service (they provide a space in their computers to host your blog).
You can buy a domain name from one company and hosting from a different one, but we prefer to get them from the same company.
There are many hosting companies out there. Previously we used Bluehost but we didn’t like their customer service as they always took a long time to sort out issues.
We are now with A2 Hosting, after we switched to them everything has been working smoothly, our website works faster, with zero downtime, and the customer service is just excellent.
To buy your domain and hosting service, go to A2 Hosting and click on ‘Shared Hosting’.
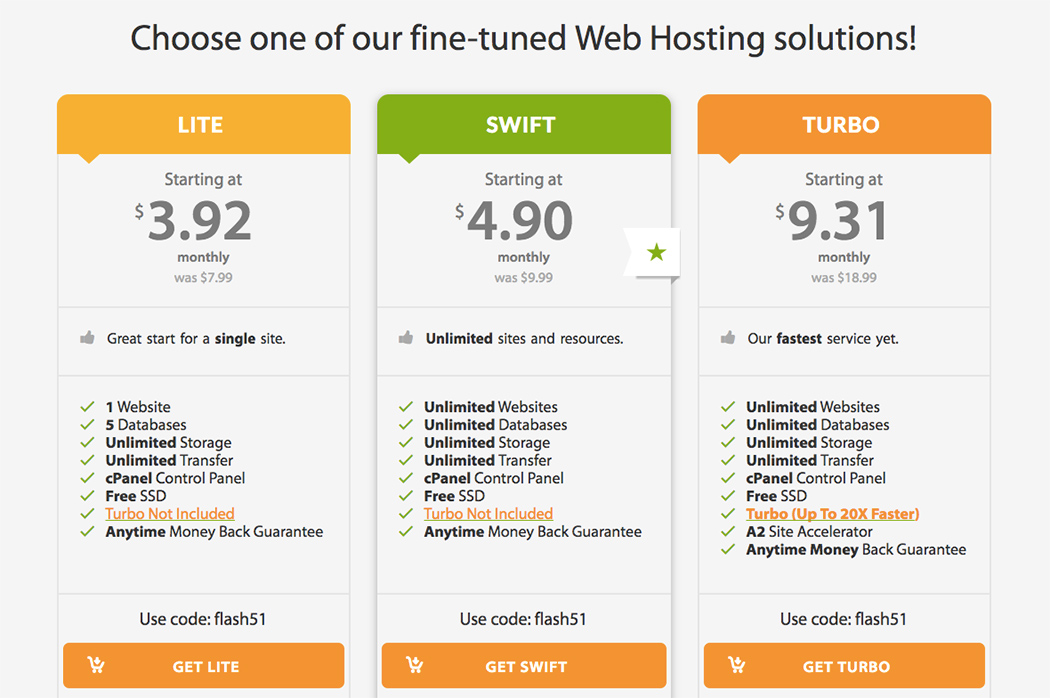
From there you will be on a page with three different plans: Lite, Swift and Turbo. We have the Turbo plan because of the more advanced features (up to 20x faster), but you can start with the Lite one, which you’ll be able to update anytime the traffic of visitors increases on your blog.
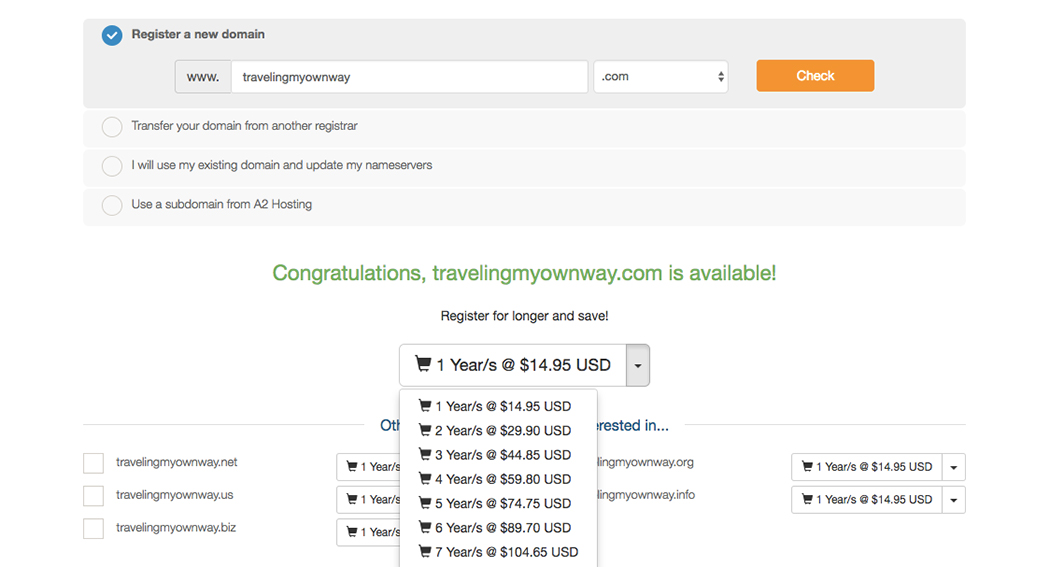
Once you have decided on the best plan for you, you’ll be able to see if the name you’ve chosen for your blog is available. If you’ve chosen a unique and original name, there are high chances you’ll be able to buy it. If not, don’t despair, try some alternatives, you have your brainstorming list, and for sure there are some other good name to choose from.
Is the name you chose available? Congratulations! Now you have the option to register for longer and save some money. I suggest registering for at least 2 years. Click ‘Continue’ and you will be able to select some add-ons and see the order summary.
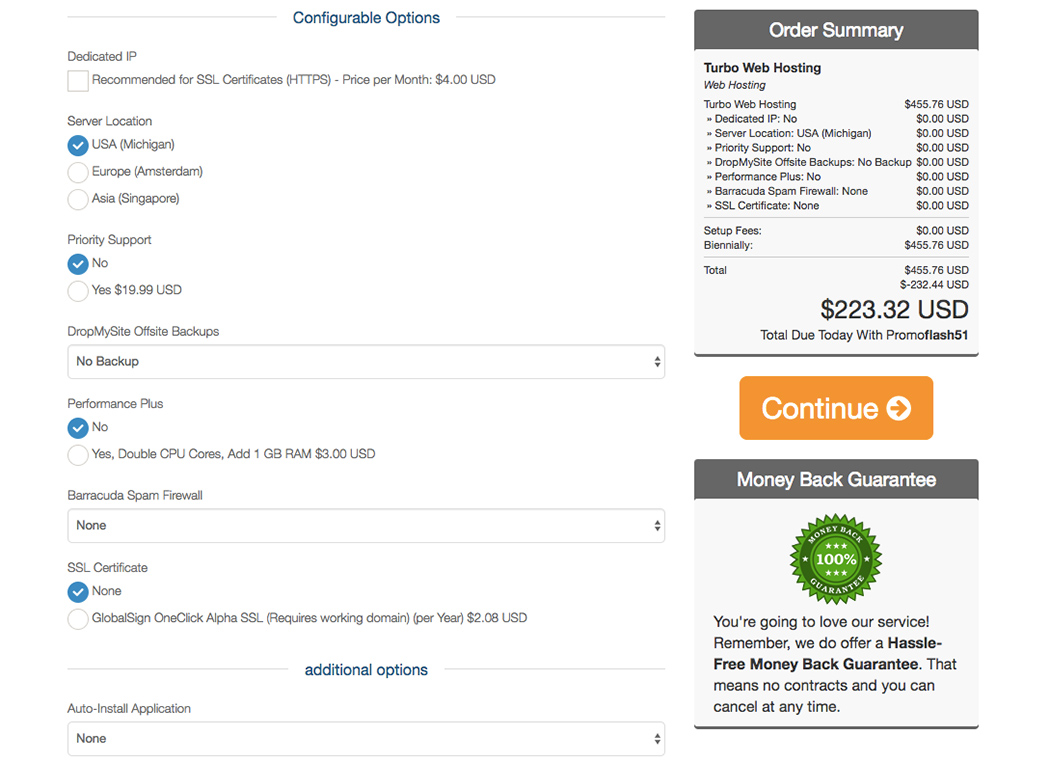
Chose the closest server location to you. Leave the other options to ‘none’ if you don’t need them (you can buy them later, if you prefer) and don’t auto-install any application.
Review your order and if you are happy with it, just click ‘Continue’. Check your domain name again, if it is correct, go on to the next screen. Another review and you can checkout.
All you have to do now is to enter your personal and bank details on the next page and complete your order.
Excellent! Now, you have a domain and you are hosted! The next step is installing WordPress.
Install WordPress
Once you’ve bought the hosting, you will get an email with the instructions to login into the A2 Hosting dashboard.
Log in to your account and you will see your ‘Services/Domains/Tickets/Invoice’.
Click on ‘Services’ and on your product click on ‘Manage’. On the next page click on the left side where there is ‘Login to CPanel’. Scroll down to ‘Softaculous Apps Installer’ and then look for ‘WordPress’ at the end of the list (do not use ‘WordPress A2 Optimised’ as it prevents to install some plugins).
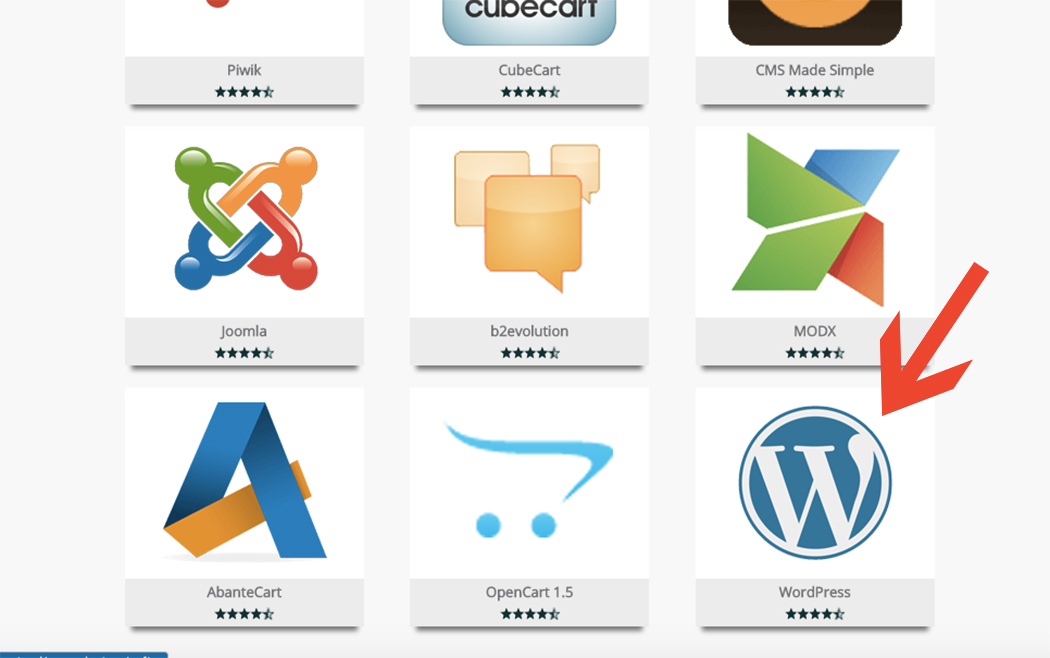
Click ‘install’ and on the next page just change the admin username, password and email (do not use usernames like ‘admin’ or ‘administrator’). Click again ‘install’ and you are done.
You will soon get an email with the link to access your new shining WordPress blog.
Install a premium theme
At this point you need a theme to start your travel blog. WordPress comes with some free themes but if you want to take your blog seriously, then I highly recommend purchasing a premium theme with a great design.
We use Impreza for this blog but there are many other amazing themes out there that might even make it hard for you to pick only one! So many choices! Our favorite websites for themes are:
Theme Forest
We bought Impreza from this website and we check it often and keep ourselves updated with new trendy themes and plugins that might be useful for the blog. You can find everything you’ll need to improve the functionality of your blog.
Elegant Themes
ElegantThemes is famous for the all-purpose WordPress theme Divi. We use it for Ivana’s Slovak travel blog, which is incredibly easy to use. It’s fully responsive and highly customizable, and with the help of the page builder, there is no limit to your creativity.
Thrive Themes
The guys at ThriveThemes know how important is to convert your readers into new followers and subscribers. Their themes are famous for speed, readability and clarity. They are built for conversion optimization, and all of their elements focus on building your mailing list fast.
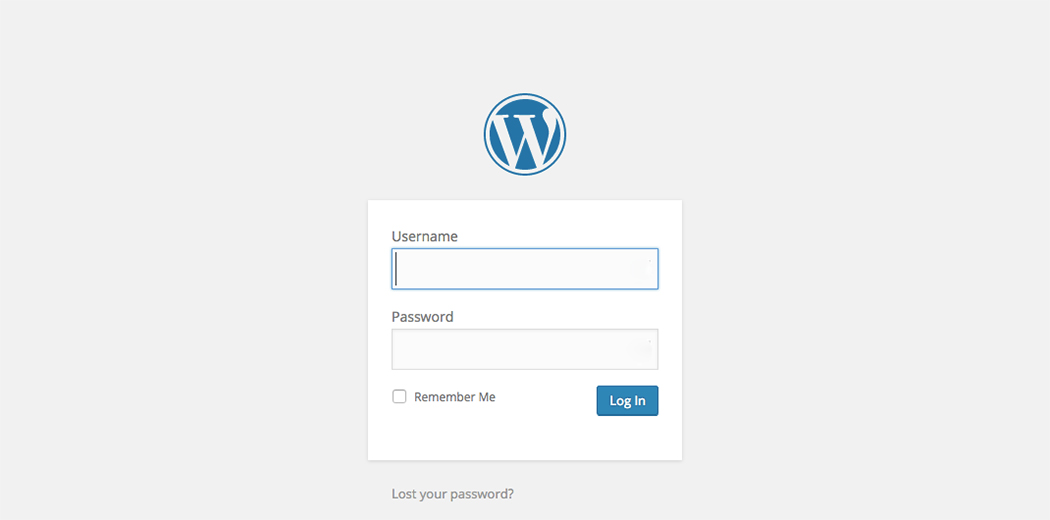
Once you have decided and purchased your theme, log in to your WordPress blog, go to Appearance > Themes and you’ll be able to upload your new theme as a .zip file.
You’ll probably find that the theme doesn’t look like the demo that you liked so much; this is because you don’t have any content there, and you’ll need to customise that, too.
Start with the essentials. On the sidebar of your WordPress dashboard, go to Appearance where you’ll find the theme options, and all the sections for widgets and menus.
Start to write the name of your blog, upload the logo (you have one, don’t you?) Then choose the font size and colors, and format for your posts and pages.
If you have problems, read and follow the theme documentation and little by little you’ll will start seeing your theme the way the demo looked when you decided to buy it.
Install Plugins
One of the reasons why WordPress is so popular is that it has the possibility to extend its functionality with dedicated plugins. The plugins will allow you to do almost everything.
They will help you to set up your social media icons, protect your website, do back-ups, check the keywords of your articles, create contact forms, read your stats, optimize your pictures… the possibilities are endless.
Try not to upload too many plugins, limit their number, and always buy plugins from reliable developers. Why? Because plugins can slow down your site, especially when they’re written with a bad code, and you don’t want this to happen.
These are the essential plugins that we use and I recommend:
Akismet
This is a must-have! It’s the best plugin out there to protect your blog from spammy comments, because sooner or later; you’ll get a lot of them. It usually comes pre-installed with WordPress.
BackWPup
An essential plugin to back up all the files of your blog to Dropbox, because backing up is of paramount importance when you have an online business.
Easy Social Share Buttons
A plugin that will help you to set-up all your social media icons throughout your blog.
WPBakery Visual Composer
This plugin will help you to create posts and pages with different design and styles, short-codes, animated pictures, columns, buttons, testimonials, and predefined templates. It’s probably the best page builder out there.
Interactive World Map
A cool and cheap plugin that allows you to create a map of the countries you have visited. Check our page ‘Destinations’ to get a better picture.
Thrive Leads
This plugin allows building your mailing list easily. You can create and customise every type of opt-in forms, run A/B tests, and they have some great reports that will help you to target the right audience.
Google Analytics Dashboard
If you don’t want to login to Google Analytics (GA) every time you want to check your stats, this is your solution. You connect the plugin with your GA code, and every time you are in the dashboard of your blog, you can have access to all your data.
W3 Total Cache
Another essential. This will help to optimize the speed and the performance of your blog.
WordFence Security
A popular antivirus and firewall for WordPress.
Yoast SEO
The number one plugin that will help you check the keywords of your posts and optimise them for SEO (Search Engine Optimisation).
Create a mailing list
Your mailing list is one of the most important assets of your travel blog. You should set and create a mailing list from day one. Why? With a mailing list you will be able to communicate with your readers on a different level.
The readers that subscribe to your mailing list are those who are interested in “backstage stories,” and they will love reading what you’re doing when you’re not blogging, what your plans are, or maybe what your mishaps were that you never published neither on your blog, nor on social media.
Still here? Fantastic!
Then I assume you’re really enthusiastic about starting your own travel blog!
These are basic, yet very crucial steps you need to know to set and start a travel blog. Of course, this is only the beginning. Now that your blog is ready and you’ve set a mailing list, it’s time to create engaging content and eventually monetize your blog.
Affiliate and SEO
How to make money from a travel blog is a question we got asked many times. There are many, and we really mean MANY ways how to make a living with a travel blog. For us one of the most efficient ways how to monetize our travel blog is through affiliates.
However, to get to the point you make money with affiliates, your articles need to be optimized for search engines. That way they appear (ideally) on the first page of Google so people will find them and buy a product or service you suggest.
To put it simple, the more you want to sell, the more people you need to get to your blog. To do so, you need to create high quality articles that would rank high in Google. If you’re new to the topic of SEO, we suggest to read this SEO Guide where you’ll find all necessary information.
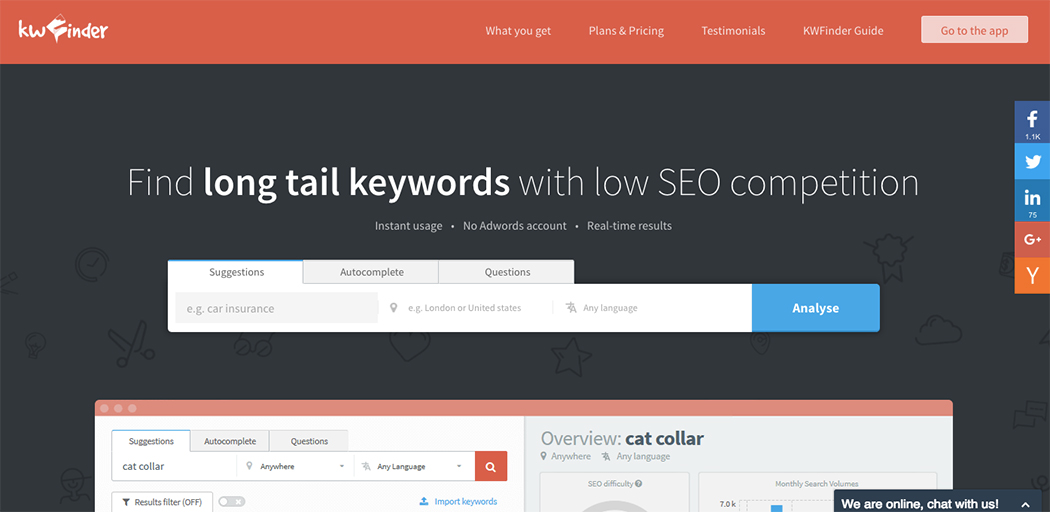
You’ll learn that one of the most important thing when creating SEO content is to use the right keywords. There are many tools that will help you to do it. We highly recommend KW Finder that we’re using ourselves and we’re very happy with! It’s simple, fast, cheap and will help you a lot to find keywords easy to rank for.
Once you get enough traffic to your blog, it’s time to sign up for relevant affiliate programs so you can get some commission from the sales. In case you have no idea which programs to start with, sign up for Awin website, where you’ll find a lot of companies that offer affiliate programs. It’s up to you how many you pick. All depends on your content and intention to monetize your travel blog.
That’s all for now. Hopefully you’ve found this guide to how to start a travel blog useful and you’re ready to start an exciting and creative adventure with your unique travel blog!

Disclosure: Some of the links above are affiliate links, which at no extra cost to you, will earn us a small commission and reduce the costs of running this site. We personally use or have used all of the services and products above and we highly recommend them.


6 thoughts on “How to Start a Travel Blog and Make Money”
Hi Ivana & Gianni…
Very good stuff. I agree with you. Beside a beautiful layout we need to have ability to create original and good quality articles. So that our blog will seem unique then will attract people coming back to our blog. SEO understanding is also essential.
Thank you for reading, Hajar, glad you’ve found the post informative. Happy blogging!
Nice Post and Very Beautiful! Thank you for sharing.
This article has sparked the fulfillment of my dream to start a travel blog and attract potential travellers to my beautiful country Tanzania. I would like to get more information and kick start. Charles
Hi Charles, thanks for reading! Great to hear about your eagerness to start promoting Tanzania 🙂
Cheers and all the best!
Heya, this may be a silly question, but why do you need to choose and pay for a Host if you already have wordpress and have installed your own domain name? And is the info that Google analytics gives you that much better than what you already get on your stats page?
Thanks!
Comments are closed.